前言
在現代 Web 應用程式架構中,使用 AWS S3 搭配 CloudFront 來託管靜態網站是一個非常受歡迎的解決方案。這種架構結合了多項 AWS 服務的優勢,提供了高效能、高可用性且成本效益極佳的網站託管方案。
為什麼選擇這個架構?
全球 CDN 加速
- CloudFront 在全球擁有超過 400 個邊緣節點(Edge Locations)
- 使用者可以從最近的節點獲取內容,大幅降低延遲
- 自動快取靜態資源,減少源站負載
HTTPS 安全連線
- 透過 ACM(AWS Certificate Manager)免費取得 SSL/TLS 憑證
- 自動續約,無需手動管理憑證生命週期
- 支援 TLS 1.3,提供最新的安全標準
成本效益
- S3 儲存成本極低(約 $0.023/GB/月)
- CloudFront 提供免費額度(每月 1TB 資料傳輸)
- 無需管理伺服器,節省維運成本
- 按使用量付費,適合各種規模的網站
高可用性與耐久性
- S3 提供 99.999999999%(11 個 9)的資料耐久性
- CloudFront 自動處理流量分配與故障轉移
- 無單點故障風險
架構圖
| |
先決條件
在開始之前,請確保您具備以下條件:
- 有效的 AWS 帳戶並具有適當的 IAM 權限
- 已註冊的域名(可透過 Route 53 或其他域名註冊商)
- 準備好要部署的靜態網站檔案
步驟一:建立 ACM 憑證
AWS Certificate Manager (ACM) 提供免費的公開 SSL/TLS 憑證,可與 CloudFront 無縫整合。
重要提醒:若要將 ACM 憑證與 CloudFront 搭配使用,必須在 us-east-1(維吉尼亞北部) 區域申請憑證。這是 CloudFront 的硬性要求。
透過 Console 操作
前往 ACM Console,確認區域為
us-east-1,選擇「請求公有憑證」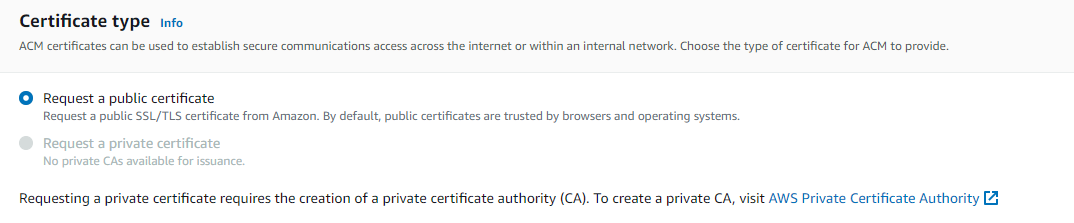
加入域名,建議同時申請根域名和萬用字元子域名:
astroicers.link(根域名)*.astroicers.link(所有子域名)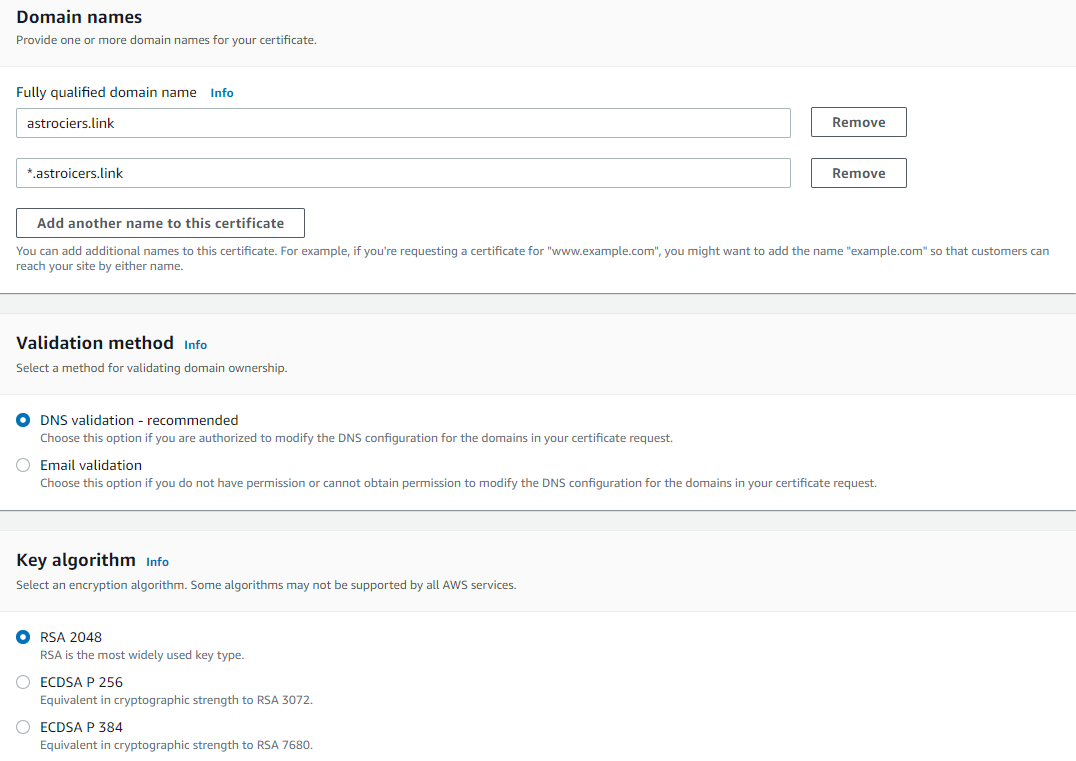
選擇驗證方式(建議使用 DNS 驗證):
- DNS 驗證:在 DNS 新增 CNAME 記錄,適合長期使用
- Email 驗證:透過域名管理員信箱確認,較為繁瑣
完成申請後,依照指示完成域名驗證。若使用 Route 53,可直接點選「在 Route 53 中建立記錄」一鍵完成。
AWS CLI 替代方案
| |
步驟二:建立 S3 Bucket
S3 Bucket 將作為靜態網站的檔案儲存庫。
透過 Console 操作
設定 S3 名稱,建議與域名相同以便識別(例如:
astroicers.link)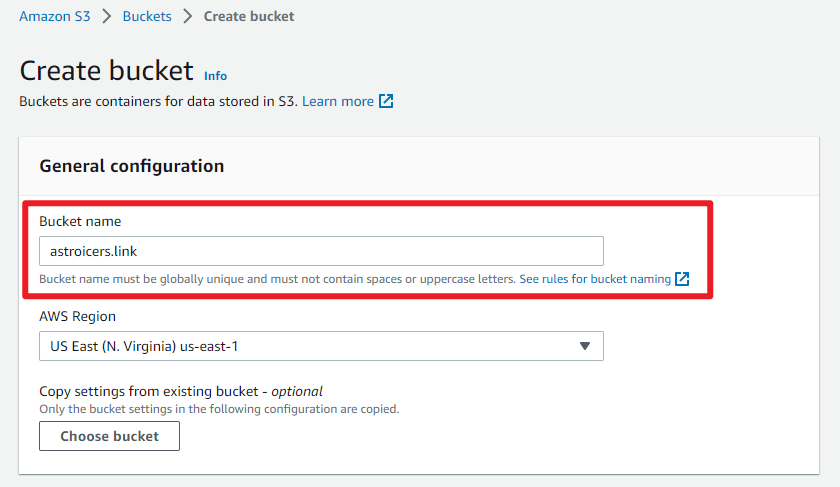
區域選擇:選擇離主要使用者較近的區域可降低源站延遲,但因使用 CloudFront,影響較小
物件所有權:保持預設「ACL 已停用」
封鎖公開存取:保持全部勾選(稍後透過 CloudFront OAC 存取)
儲存貯體版本控制:建議啟用,可追蹤檔案變更歷史
其餘設定保持預設,完成建立
AWS CLI 替代方案
| |
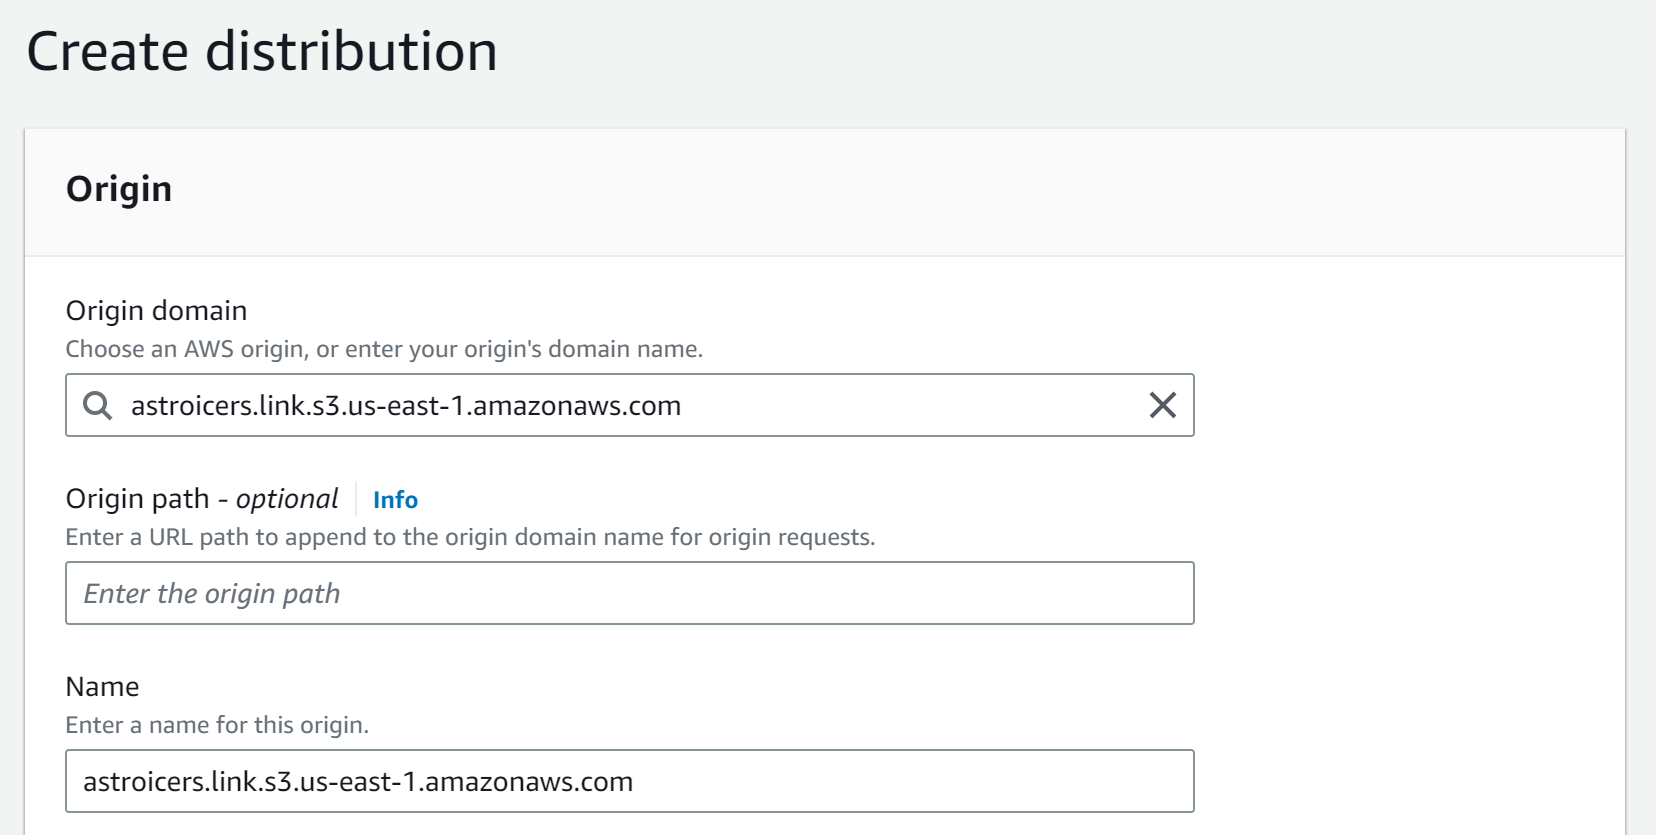
步驟三:建立 CloudFront Distribution
CloudFront 是 AWS 的 CDN 服務,負責將內容快取到全球邊緣節點。
透過 Console 操作
設定 Origin:
- Origin Domain:選擇剛建立的 S3 Bucket
- 名稱:可自訂識別名稱
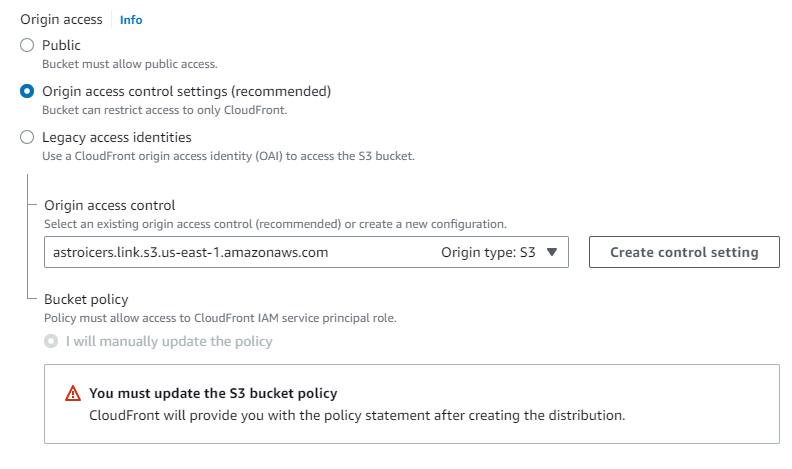
設定 Origin Access Control (OAC):
- 選擇「Origin access control settings (recommended)」
- 建立新的 OAC 或選擇現有的
- 這確保只有 CloudFront 可以存取 S3 內容,提高安全性
設定檢視器協定政策:
- 選擇「Redirect HTTP to HTTPS」強制使用安全連線
- 這確保所有流量都經過加密

設定快取政策:
- 可使用預設的「CachingOptimized」政策
- 或自訂快取行為以符合需求

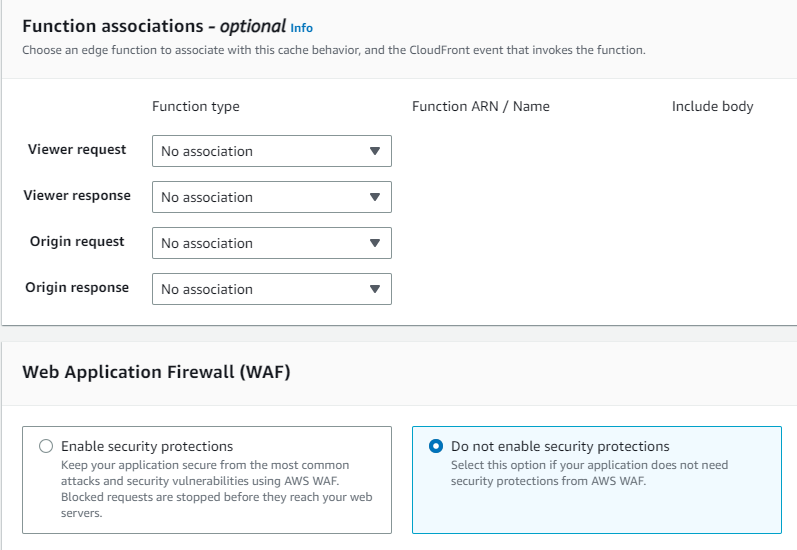
Web Application Firewall (WAF):
- 評估需求決定是否啟用
- WAF 費用較高(約 $5/月 + 每百萬請求 $0.60)
- 若網站為純靜態內容,可考慮不啟用
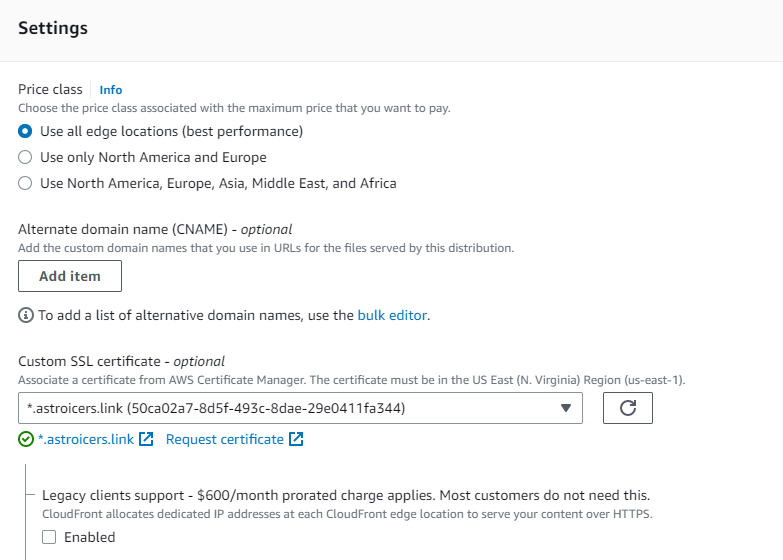
設定 SSL 憑證與替代域名:
- 在「替代域名 (CNAMEs)」輸入您的域名
- 選擇先前在 us-east-1 建立的 ACM 憑證
- 建議選擇 TLSv1.2_2021 或更新的安全政策
設定預設根物件:
- 輸入
index.html(或您的首頁檔名)
- 輸入
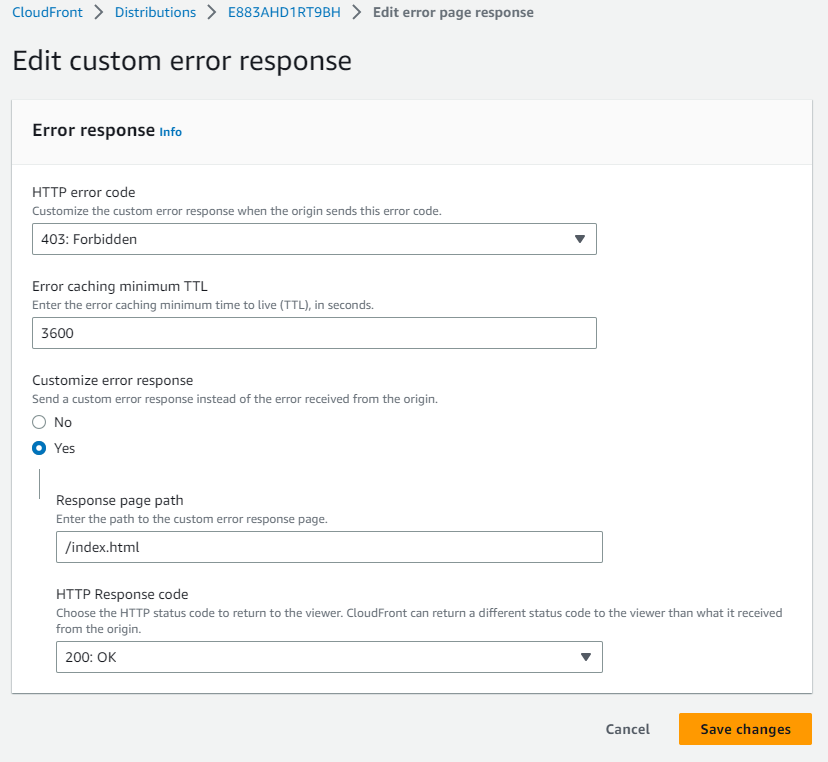
設定錯誤回應:
- 建議設定自訂錯誤頁面提升使用者體驗

- 建議設定自訂錯誤頁面提升使用者體驗
設定 403/404 錯誤處理:
- 對於 SPA(Single Page Application),建議將 403/404 導向 index.html
- 回應碼可設為 200,讓前端路由處理
其餘設定保持預設,完成建立
AWS CLI 替代方案
| |
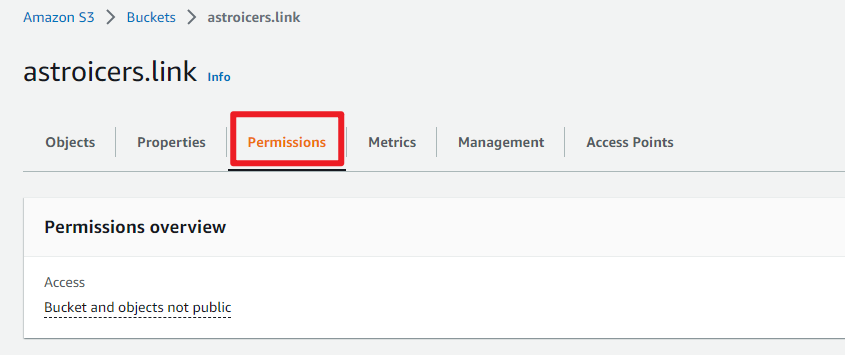
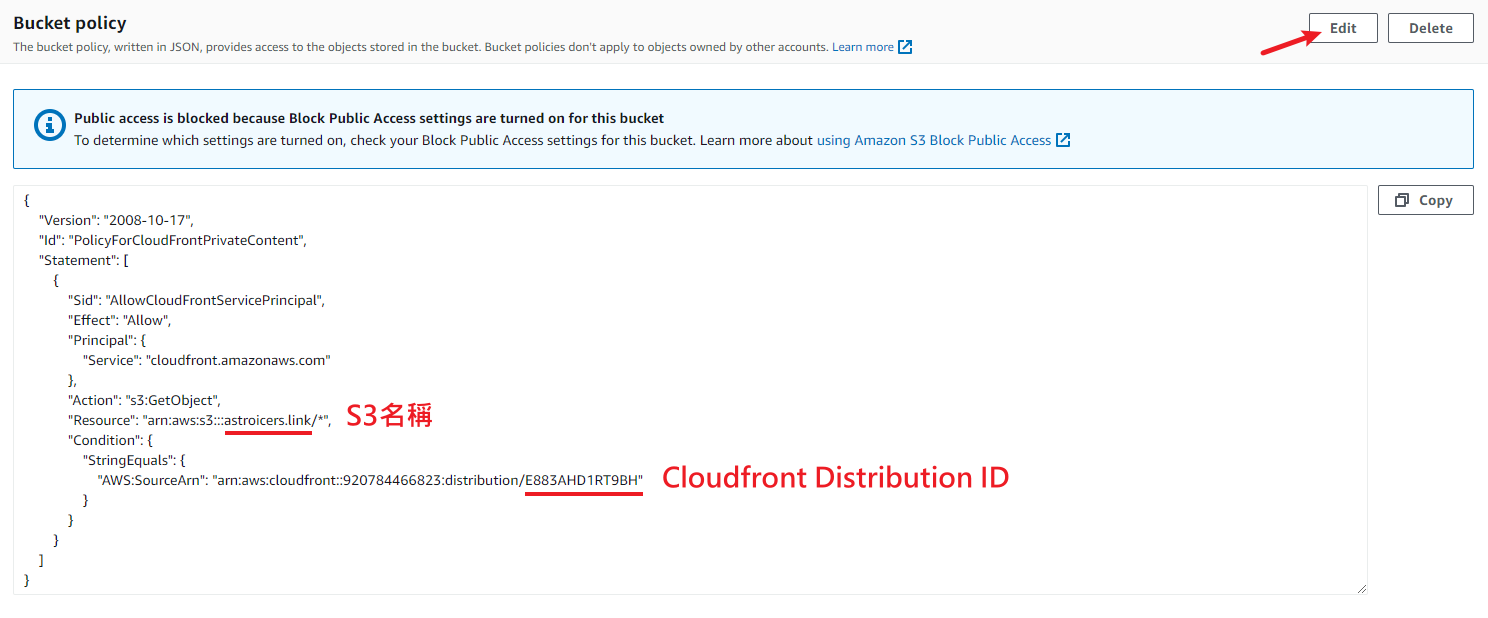
步驟四:設定 S3 Bucket 權限
建立 CloudFront Distribution 後,需要更新 S3 Bucket 政策,允許 CloudFront 存取。
透過 Console 操作
進入 S3 Bucket 頁面,選擇「權限」標籤
在「儲存貯體政策」區塊選擇「編輯」,貼上以下政策(修改紅線標示的部分):
S3 Bucket 政策範例
| |
說明:請將
123456789012替換為您的 AWS 帳戶 ID,EDFDVBD6EXAMPLE替換為您的 CloudFront Distribution ID。
AWS CLI 替代方案
| |
步驟五:設定 Route 53 DNS
若您使用 Route 53 管理 DNS,需要建立記錄將域名指向 CloudFront。
透過 Console 操作
前往 Route 53 Console,選擇您的 Hosted Zone
建立以下記錄:
根域名(Apex Domain):
- 記錄名稱:留空(或輸入根域名)
- 記錄類型:A
- 別名:是
- 路由流量至:CloudFront Distribution
- 選擇您的 Distribution
www 子域名:
- 記錄名稱:www
- 記錄類型:A(或 CNAME)
- 別名:是
- 路由流量至:CloudFront Distribution
AWS CLI 替代方案
| |
注意:
Z2FDTNDATAQYW2是 CloudFront 的固定 Hosted Zone ID,適用於所有 CloudFront Distribution。
快取失效(Invalidation)
由於 CloudFront 會快取內容(預設 24 小時),當網站更新後,使用者可能看到舊版內容。透過建立 Invalidation 可以立即清除快取。
透過 Console 操作
進入 CloudFront Distribution,選擇「Invalidations」標籤

點選「Create invalidation」,輸入要清除的路徑:
/*:清除所有快取/index.html:只清除首頁/images/*:清除 images 目錄下所有檔案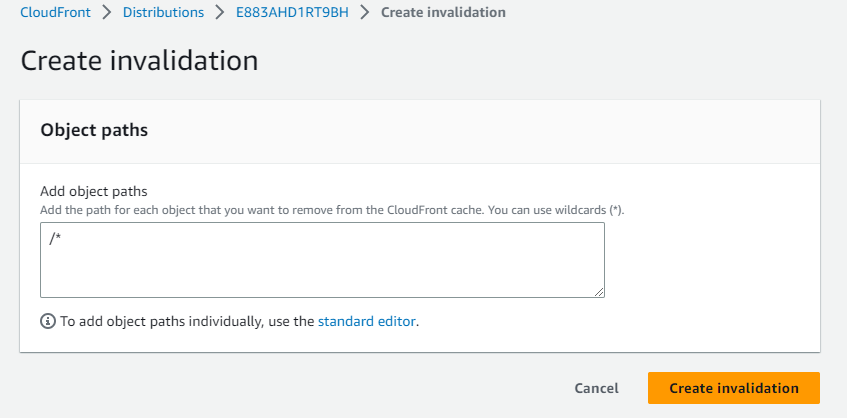
完成建立,通常 5-10 分鐘內生效
AWS CLI 替代方案
| |
自動化 Invalidation
在 CI/CD 流程中,可以在部署後自動執行 Invalidation:
| |
成本考量與最佳實務
預估月費用(以小型網站為例)
| 服務 | 用量 | 預估費用(USD) |
|---|---|---|
| S3 儲存 | 1 GB | $0.023 |
| S3 請求 | 10,000 GET | $0.004 |
| CloudFront 傳輸 | 50 GB | $0(免費額度內) |
| CloudFront 請求 | 100,000 | $0(免費額度內) |
| Route 53 Hosted Zone | 1 個 | $0.50 |
| ACM 憑證 | - | 免費 |
| 總計 | 約 $0.53/月 |
成本優化建議
善用快取
- 設定適當的 Cache-Control 標頭
- 對靜態資源使用較長的快取時間
- 減少 Invalidation 次數(每月前 1,000 次免費)
壓縮設定
- 確保 CloudFront 啟用自動壓縮(Gzip/Brotli)
- 可減少 50-70% 的傳輸量
選擇適當的價格類別
PriceClass_100:僅北美和歐洲(最便宜)PriceClass_200:不含南美和澳洲PriceClass_All:所有邊緣節點(預設)
| |
安全性最佳實務
- 啟用 HTTPS Only:強制所有流量使用 HTTPS
- 使用 OAC:確保 S3 只能透過 CloudFront 存取
- 設定安全標頭:透過 CloudFront Functions 添加安全標頭
| |
故障排除指南
常見問題與解決方案
問題 1:AccessDenied 錯誤
| |
可能原因與解決方案:
- S3 Bucket 政策未正確設定:檢查 CloudFront Distribution ARN 是否正確
- OAC 未正確關聯:確認 CloudFront Origin 設定
- 檔案不存在:確認 S3 中有對應的檔案
| |
問題 2:憑證錯誤
| |
可能原因與解決方案:
- ACM 憑證不在 us-east-1:重新在 us-east-1 申請
- 域名不匹配:確認 ACM 憑證包含正確的域名
- CloudFront 未選擇憑證:檢查 Distribution 設定
問題 3:快取未更新
解決方案:
| |
問題 4:DNS 解析失敗
檢查步驟:
| |
問題 5:CORS 錯誤
若網站需要跨域請求,需設定 CORS:
| |
除錯工具
| |
總結
透過 S3 + CloudFront + ACM 的組合,我們可以輕鬆建立一個:
- 高效能:全球 CDN 加速
- 安全:免費 HTTPS 憑證
- 可靠:99.9% 以上可用性
- 經濟:極低的營運成本
這個架構特別適合:
- 個人部落格
- 企業形象網站
- 技術文件網站
- Single Page Application (SPA)
如有任何問題,歡迎在下方留言討論!